For the past 200 years, history has been recorded and portrayed via photography of anything from landscapes to historical events.
In 1851, a photograph of a falsified document was produced and accepted as evidence in court, sparking the development of photography as a forensic tool that quickly aided in scene analysis and identification cases.
In the 1870s, forensic photography attained cutting-edge status, and ever since, its applications have grown.
Photographs provide a visual documentation of the scene and the locations of the evidence inside the scene but are not considered evidence in and of itself in this discussion.
Investigators can recreate a crime scene for subsequent study or use in court using photos collected at the site. It might hurt the investigation and be possibly harmful at a criminal trial if the crime scene photographs do not correctly and completely capture the full scene.
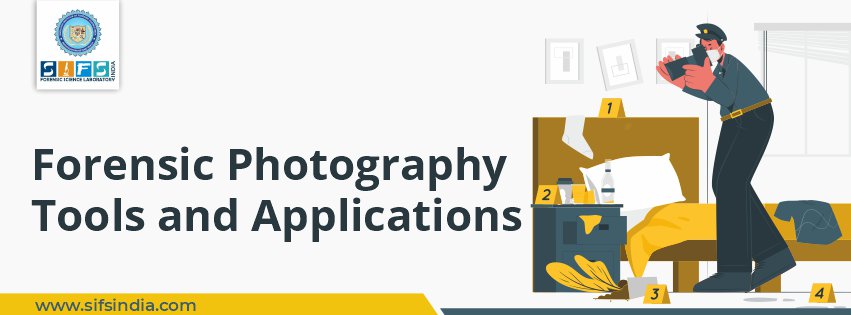
Recording the Crime Scene
The process of photographically recording a crime scene is not time-bound.
The size and complexity of the crime scene, the quantity of information that has to be documented, and environmental considerations like weather or threat to the investigation team all affect how much time is required.
It can take many hours of labor and thousands of photos.
Photography, often known as "light writing or drawing," is described as the method or art of forming pictures of things on sensitive surfaces by the chemical action of light or other sources of radiant energy such as X-rays, gamma rays, or cosmic rays.
Since the 1820s, it has been feasible to permanently fix a picture in a number of methods, including daguerreotypes, silver plates, film, and now digitally.
Controlling the Situation
Aperture, shutter speed, depth of field, white balance, and other parameters are used by photographers to instruct the camera how to take the picture.
Shutter speed is the length of time that the camera's opening, or shutter, is open, while aperture is the size of that opening.
Depth of the field is the amount of space in front of (foreground) and behind (background) an object that stays in focus.
Last but not least, white balance enables the camera to accurately capture the right light temperature, resulting in a depiction of the color tones of objects in the shot.
Lighting up The Night
An approach known as "painting with light" is frequently used by seasoned photographers to reveal image details in low-light or near-low-light situations.
This technique involves holding the shutter open for a few seconds or minutes as the photographer moves around the area adding light from objects like a flashlight or a flash from a detachable camera.

Figure 1 - Crime scene at night

Figure 2 - After using the Painting with Light Method, the Same Scene
The basic goal of forensic photography is to meticulously chronicle the whole scene, the evidence, and any areas of particular value to the investigation, regardless of how the photographer choose to capture the image.
Forensic Photography Process
For all physical crime scenes, including auto accidents, break-ins, killings, or any other type of crime against persons or property, photography should be utilized as part of the record.
The viewer of a photograph, however, may be misled or confused. Therefore, while recording as much precise information and detail as they can, crime scene photographers must make sure their work is both ethical and honest.
When attempting to put together what occurred, how it occurred, and who committed the crime, documenting every component of the crime scene is a crucial first step.
First responders often help victims at crime scenes until investigators get to work.
This makes crime scenes chaotic and unpredictable. Even in the best circumstances, getting photographic proof might be difficult.
An expert photographer will know how to capture pictures throughout the inquiry and that having too many pictures is preferable than not having enough.
In order to guarantee appropriate photographic documentation, the following measures are taken:
1. Secure The Scene: The first stage in every forensic investigation is to secure the crime scene.
2. Assess The Environment: The photographer should next assess the light and weather conditions and make the necessary adjustments to the camera settings. No one camera configuration will be effective for all crime scenes since they might be either indoors, outdoors, or both; vehicles; many rooms; or any combination of these.
3. Shoot The Scene: Before anything is disrupted, the photographer should snap images of the situation, gradually moving from the outside into close-up shots. To establish the link between the evidence and the general scene, many photos from the full scene to medium shots should be obtained.
Just like a television show will show the outside of a building to establish where the protagonists are heading, the crime scene photographer should capture the full scene first utilizing wide-angle photographs capturing the entire scene from the approach and through every location.
Close-up photographs of evidence can be taken out of context, therefore setting the scenario first using wide and medium views is crucial.
Additionally, photos taken from the site should glance up to catch any possible environmental elements or evidence that may be above the scene.
4. Take Pictures of The Victims: The next set of photos should include victims (if any are present) to indicate whereabouts, injuries, and state of health.
5. Take Pictures of The Evidence: Next, you should take pictures of each item of evidence to show where it was located. This creates the connections between the victim and the room, the victim and the evidence, and so on.
To avoid any distance distortions, these images should be taken straight on or straight up at right angles. Every item of evidence should be shot both with and without a scale to show size.

Figure 3 - The Perspective Angle of Photography
6. Evidence Markers: Images should be captured both before and after evidence markers are positioned. These early photographs are crucial to demonstrating that the crime scene has not been altered.
7. Retake for New Evidence: If investigators mark new evidence, the whole sequence of pictures, including all evidence shots, should be taken again. These images have to show the whole piece of proof together with a scale to show the size.

Figure 4 - Use of Scale in Forensic Evidence Photography
To photograph items like fingerprints, indentations, shoe and tyre prints, vehicle identifying numbers (VIN), and extremely minute bits of evidence, special imaging techniques and illumination should be employed.
Techniques could consist of:
- Alternative Light Sources (ALS): Such as lasers, blue or green lights, and colored filters that can be used to illuminate for photography while also assisting in the detection of processed latent fingerprints or other concealed evidence.

Figure 5 - Green Light Used to Illuminate a Latent Fingerprint
- Oblique Angle Lighting: It is the practice of using a flashlight, camera flash, or ALS at a very low angle to create shadows that allow for the photographing of an impression or imprint.

Figure 6 - Oblique Light used to add Contrast to Footprint
- Macro Lenses: These may capture extremely close-up photographs (1:1 or 1:2) of minute objects such as tool marks or trace evidence.

Figure 6 - Cartridge Case Details Captured with Macro Lens
The lighting of the location should be appropriately captured in photographs.
If additional artificial light, such as a flash, is required after the photo shoot, the photographer will do so to make up for the camera's limitations in capturing the visible spectrum of light in some circumstances.
8. Shoot Quickly: Occasionally, weather circumstances, such as rain, snow, or traffic, might make it difficult to take pictures. To get as much visual record from a situation that is fading as possible, the photographer must act rapidly.
9. Take a Later Shot of The Sufferer: If the person has to be transferred or treated, the photographer might return to capture the wounds. Numerous methods can be used to emphasize wounds (bruising, scarring), as well as the degree of recovery.
Conclusion
Images must be recognized as functional and/or upgraded versions when they are provided. To demonstrate that the photographs are in chronological sequence and none have been deleted, the original camera's sequential numbering scheme should be kept. Original files shouldn't be renamed at all, and functioning pictures shouldn't be renamed until they are found or chosen for usage.
 May 14, 2023 - BY SIFS India